Sorry about me being MIA in my blog!
I (I mean we, the Leong family.) have been hosting a Japanese youth exchange student, Machika since last Thursday and everyday has been REALLY exciting and drop dead tiring (Lets see... We went to Batu caves, Orang Asli museum, Genting Highlands, Broga Hill, Shopping @ KLCC, Port Dickson, Ice Skating, More shopping @ Sunway Pyramid. Super fun week!)!
So glad I finally have the time to blog again today!
So anyways, Machika thought me and my brothers some origami when we were feeling a bit bored after coming back from one of our shopping trips.
I was rather hooked to the crane (I remember making it when I was schooling in Singapore but I have long forgotten how to make it!) and found it VERY addictive! (I have about 20 cranes on my caking table now! Ha ha ha!)
Okay let's start!

All you need is a piece of square origami paper.
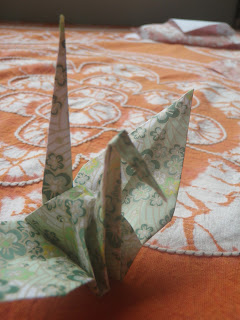
Machika bought this REALLY pretty pack of 3 origami colored paper for me all the way from Tokyo!
(I hate the green but it's the only color that is visible on my table cloth!)
And...
Both your hands of course, I have yet to learn how to do it with my feet.
Step 1:
Fold the paper into a triangle.
Repeat "Step 1".
Step 2:
Lift up one part the triangle with your finger.
And fold it down into a square.
Turn it around and do the same.
It should look like this once it is done.
Step 3:
Fold the sides of the square towards the middle.
The should be a faint line in the middle of the square so it should be easy to estimate.
Turn it around and do the same.
Step 4:
Fold down that little triangle on the top, turn it around and do the same to the other side.
Open it up!
Step 5:
Oh dear, a tough to explain part..
Open one side of the square till the folded triangle on top part.
Fold the sides into the middle.
Turn it around and do the same.
It should look like a diamond now.
Step 6:
You should be able to see that one half of the diamond has a split through it
You are going to fold the sides in again.
The pointy part of the folded triangle should be at the split.
Turn it around and do the same.
Step 7:
Now... Flip it to the 'clean' unfolded side.
(If you open up your "Step 6" origami piece slightly you should see that there are 4 sides so just flip it to the other 2 sides.)
Step 8:
Fold the bottom up to meet the slightly split top.

It should look like a rather squashed tulip once you are done with "Step 8"!
Now...
Pull the 2 tulip petals that had the split before.
Yay! It's starting to look bird-y!
Step 10:
The other 2 rather long triangles are the head and tail.
Choose the longer one (If one is longer than the other, never mind if they are both the same length!)
for the head and bend it down slightly then squash it the other way.
TAH-DAAAAAH!
~K
P.S
Hope you enjoyed my first Arts N Craft (Just for fun!) tutorial!
Comments are more than welcome as usual.


No comments:
Post a Comment